Launch a job#
To start a new job with deconvolution, chromatic aberration, stabilization, or
colocalization analysis click on Launch jobs  in the home
panel.
This page describes the general workflow which is split into the following five main steps.
The detailed description of all the parameters included by the templates used in this workflow is
documented on the following sub-pages:
in the home
panel.
This page describes the general workflow which is split into the following five main steps.
The detailed description of all the parameters included by the templates used in this workflow is
documented on the following sub-pages:
Select images (1/5)#
In step 1 -  Select Images - the user can add images
for deconvolution. A batch of images with the same properties can be selected
with Ctrl+click or Shift+click and added in one go.
Select Images - the user can add images
for deconvolution. A batch of images with the same properties can be selected
with Ctrl+click or Shift+click and added in one go.
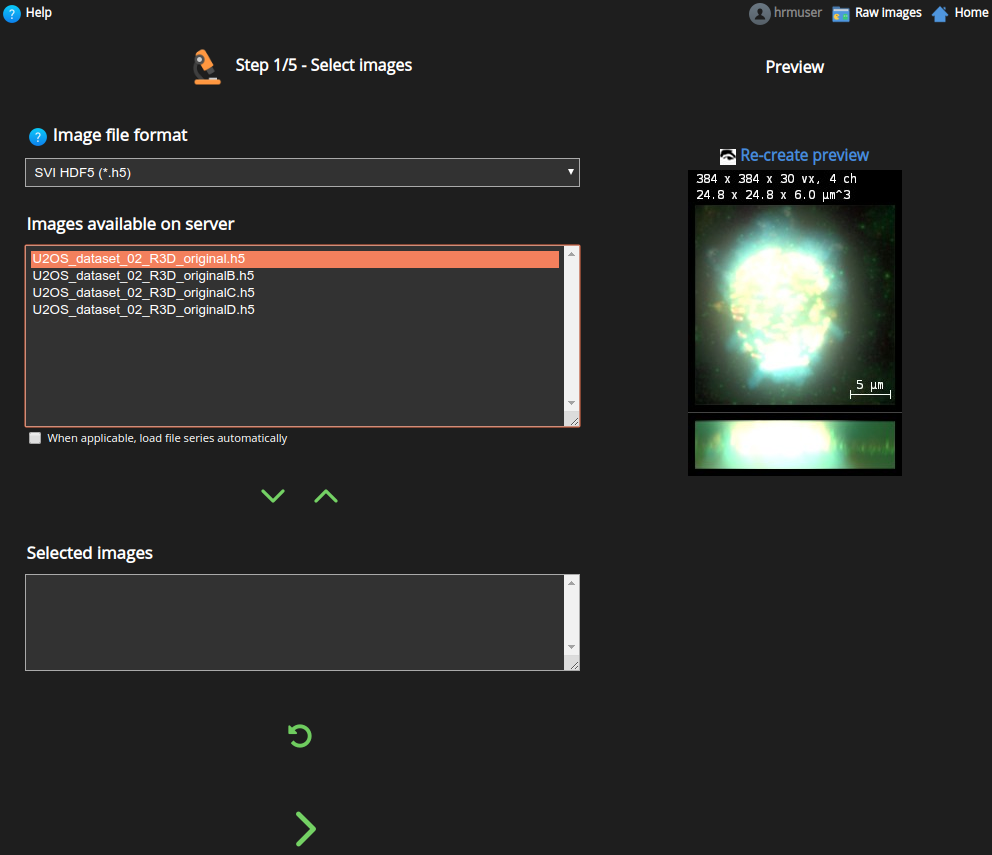
Select the file format from the drop down widget and use

 to add images to the Selected images area.
Note
The images of a batch must share the same microscopic parameters in order to obtain good deconvolution results because they will be restored with the same settings. This is generally true if the images are recorded with the same setup.
When an image is selected a preview is displayed on the right panel
whenever possible. If not yet available, a button shows up
 to generate the preview on the fly.
Note
Image previews also display the image dimensions, number of channels, and sampling sizes in the overlay.
By default no particular image format is preselected and HRM shows all images available in the user’s raw images folder. Select a file format to filter out images from other file extensions.
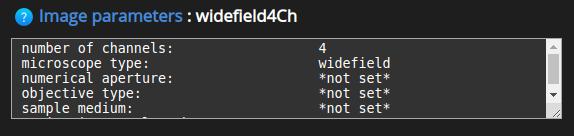
The Image Parameters (2/5)#
In step 2 -  Image Parameter - the microscope
settings can be specified and saved. The image parameters are grouped in
templates. A parameter template can be reused in future deconvolution jobs.
This will be useful when there are more images recorded under the same
conditions. Moreover, the parameter templates can be shared with one or more
HRM users.
Image Parameter - the microscope
settings can be specified and saved. The image parameters are grouped in
templates. A parameter template can be reused in future deconvolution jobs.
This will be useful when there are more images recorded under the same
conditions. Moreover, the parameter templates can be shared with one or more
HRM users.
The following selections are possible at this stage:
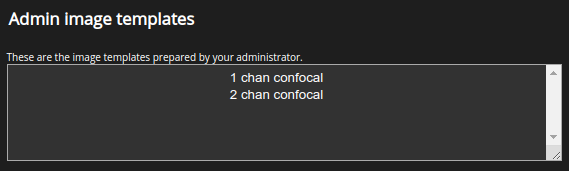
Admin image templates: parameter templates created by the HRM administrator to be used as references. These templates cannot be changed directly. Instead, they can be copied to Your image templates (see below) for further changes. For copying to Your image templates select the admin template and use
.
Your image templates: the image templates that the user can use directly. All templates in this area may be selected, edited, removed, etc.
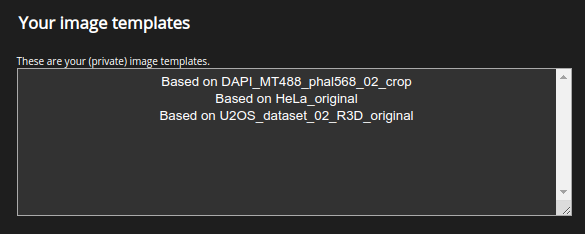
New templates can be added to the list by creating them from scratch using the  button,
by using the image metadata
button,
by using the image metadata  , by importing a shared template
  , or by modifying
an existing template
, or by modifying
an existing template  .
To modify a template simply click on the
.
To modify a template simply click on the  button.
Note


 show tooltips describing their actions w.r.t
templates. Namely, create, edit, clone,
import from an image, import from a Huygens template,
share, mark as favourite and delete.
show tooltips describing their actions w.r.t
templates. Namely, create, edit, clone,
import from an image, import from a Huygens template,
share, mark as favourite and delete.
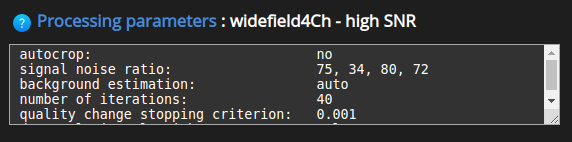
The Restoration Parameters (3/5)#
In step 3 -  Restoration Parameter -
the restoration settings can be specified and saved.
As in the previous secion the restoration parameters are grouped in templates.
A template can be reused in future deconvolution jobs.
This will be useful when other images need to be restored with the same settings.
Moreover, the templates can be shared among HRM users, fostering collaboration and re-usage of good restoration settings.
Restoration Parameter -
the restoration settings can be specified and saved.
As in the previous secion the restoration parameters are grouped in templates.
A template can be reused in future deconvolution jobs.
This will be useful when other images need to be restored with the same settings.
Moreover, the templates can be shared among HRM users, fostering collaboration and re-usage of good restoration settings.
The following selections are possible at this stage:
Admin restoration templates: parameter templates created by the HRM administrator to be used as references. They can be copied and edited by the HRM users. In order to use them, they first need to be copied to Your restoration templates by using
.Your restoration templates: the restoration templates that the user can use directly. All templates in this area may be selected, edited, removed, etc.
Note
show tooltips describing their actions w.r.t
templates. Namely, create, edit, clone,
import from a Huygens template, share,
mark as favourite and delete.
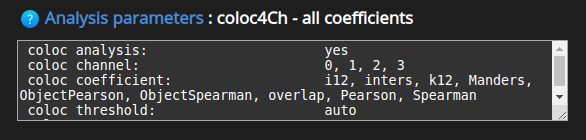
Analysis parameters (4/5)#
In step 4 -  Analysis Parameters - the analysis
settings for your images can be specified and saved. As always, the analysis
parameters are grouped in templates. A parameter template can be reused in
future deconvolution and analysis jobs. This will be useful when the same type
of analysis has to be performed on other images. Moreover, the parameter
templates can be shared among HRM users, fostering collaboration and re-usage
of good analysis settings.
Analysis Parameters - the analysis
settings for your images can be specified and saved. As always, the analysis
parameters are grouped in templates. A parameter template can be reused in
future deconvolution and analysis jobs. This will be useful when the same type
of analysis has to be performed on other images. Moreover, the parameter
templates can be shared among HRM users, fostering collaboration and re-usage
of good analysis settings.
The following selections are possible at this stage:
Admin analysis templates: parameter templates created by the HRM administrator to be used as references. They can be copied and edited by the HRM users. In order to use them, they first need to be copied to Your analysis templates by using
.Your analysis templates: the analysis templates that the user can use directly. All templates in this area may be selected, edited, removed, etc.
Note
show tooltips stating their action w.r.t
templates. Namely, create, edit, clone, share,
mark as favourite and delete.
Launch the job (5/5)#
In this last step several summaries display all the chosen parameters.
Also, the output format for the result images can be selected at the top of the page:

ICS, ICS2 and HDF5: support multi-channel images, 32 bit dynamic range (preserve all image details) and all the microscopic metadata parameters. Furthermore, they support high compression levels. Since deconvolved images often contain background regions with near 0 intensities the compression algorithms usualy manage to greatly reduce the size of the images. For all these reasons these are the formats recommended for further work with Huygens.
TIFF: this format can be used for analysis such as counting or segmentation. For quantification one needs to scale the TIFF image back to its original dynamic range. The corresponding scaling factors are reported by HRM and can be found in Parameter summaries.
IMS, OME-XML, R3D: formats offered for compatibility with other programs.
Next, review all the selected parameters before submitting the job to the server. It’s possible to go back to the image, restoration, and analysis template editors by clicking on the corresponding links.
Click on  to change the image parameters.
Click on  to change the restoration parameters.
Click on  to change the analysis parameters.
To change the image selection click on  .
.

Finally submit the job by pressing  .
.